Import voices through Workspace Settings > Voice Config to make additional ElevenLabs and Cartesia voices available to agents in the selected workspace. Imported voices are workspace-specific. Importing a voice does not select it for an agent automatically.

When To Import Voices

Use this workflow when you need a provider voice that is not already available in the agent voice picker. You can search and preview before importing. The Clone voices tab is marked Coming soon; it is not an available voice-cloning workflow.

Before You Begin

  • Confirm the active workspace in the sidebar.
  • Open your profile menu, choose Workspace Settings, then Voice Config.
  • Know the languages the agent must speak. Multiple selected languages narrow the results to voices that support all of them.

Import Voices Into Your Workspace

  1. Open Import voices.
  2. Search by voice name. Optionally select languages, gender, or a provider.
  3. Review the provider and supported languages in each result. A +N indicator means the voice has additional languages beyond those displayed in the row.
  4. Use the preview control to listen to the sample when available.
  5. Click Import beside the desired voice. Wait for the row to show Imported. A row marked Already available is already in the shared catalogue and does not need another import.
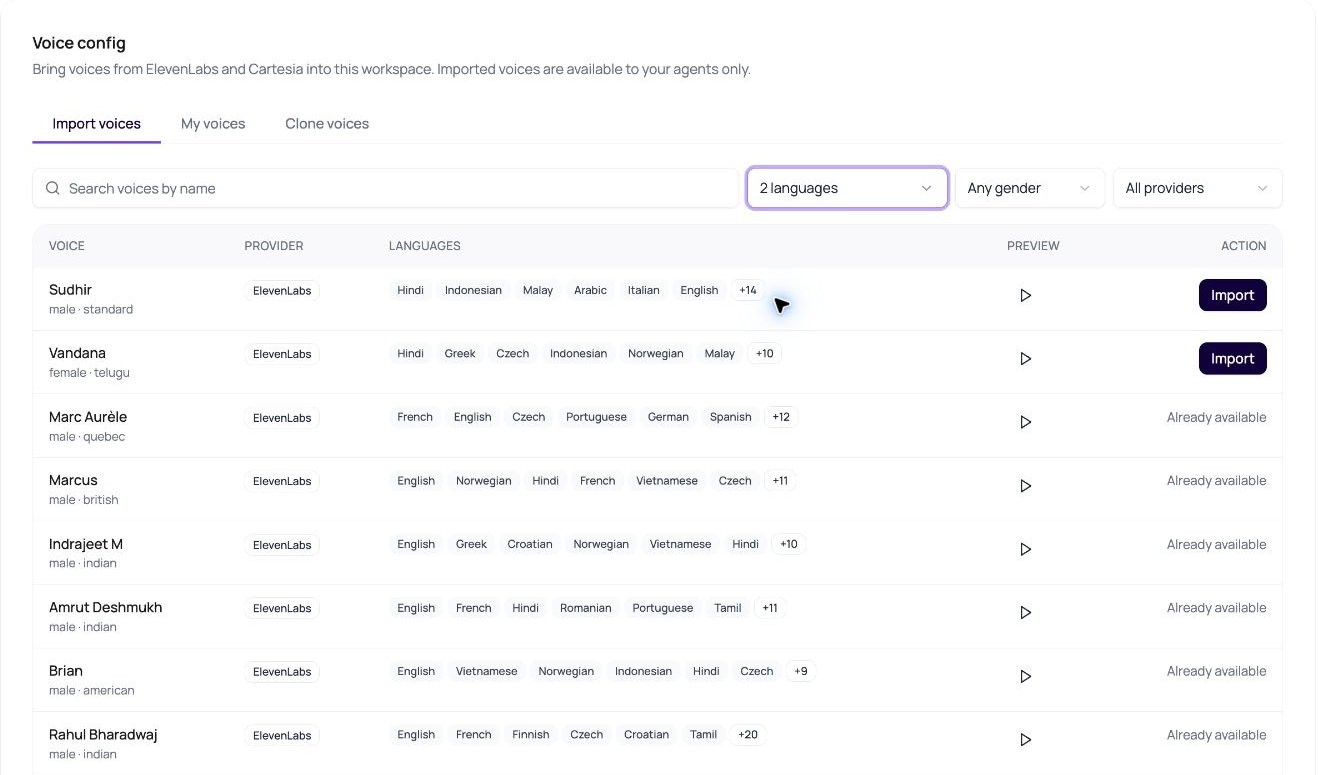
DialNexa Import voices tab showing two selected languages, gender and provider filters, voice previews, Import buttons, and Already available rows.
The search language options use individual languages. Hinglish and Multilingual are not provider-catalogue search filters. Select the underlying languages, such as Hindi and English, to find a compatible voice.

Verify The Imported Voice

Open My voices to see voices imported into this workspace and their DialNexa voice IDs. Then open a draft agent in the same workspace, choose its languages, and find the imported voice in the agent voice picker.
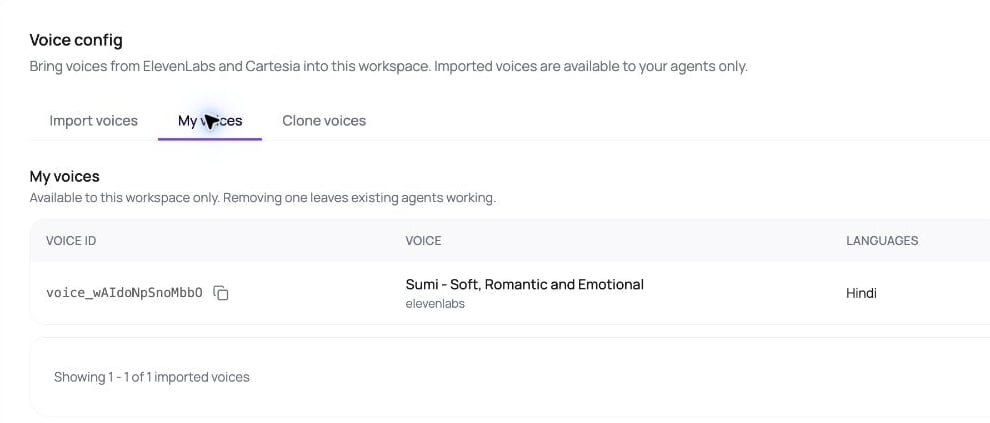
DialNexa My voices tab showing an imported Hindi voice and its Voice ID. The image is cropped before the importer details and removal controls.
Previewing a sample helps compare voices, but does not verify your prompt or telephone audio. Before publishing an agent, test its expected phrases, names, numbers, and language changes.

Remove An Imported Voice

In My voices, open the removal control for the voice. Review the confirmation before choosing Remove. If an agent still uses the voice, removal is blocked and the dialog identifies the affected agents. Switch those agents to another voice before trying again. Removing an import changes the workspace’s available voice list. Confirm that you no longer need it before proceeding. After removal, verify that it no longer appears in My voices.

Troubleshooting Voice Imports