

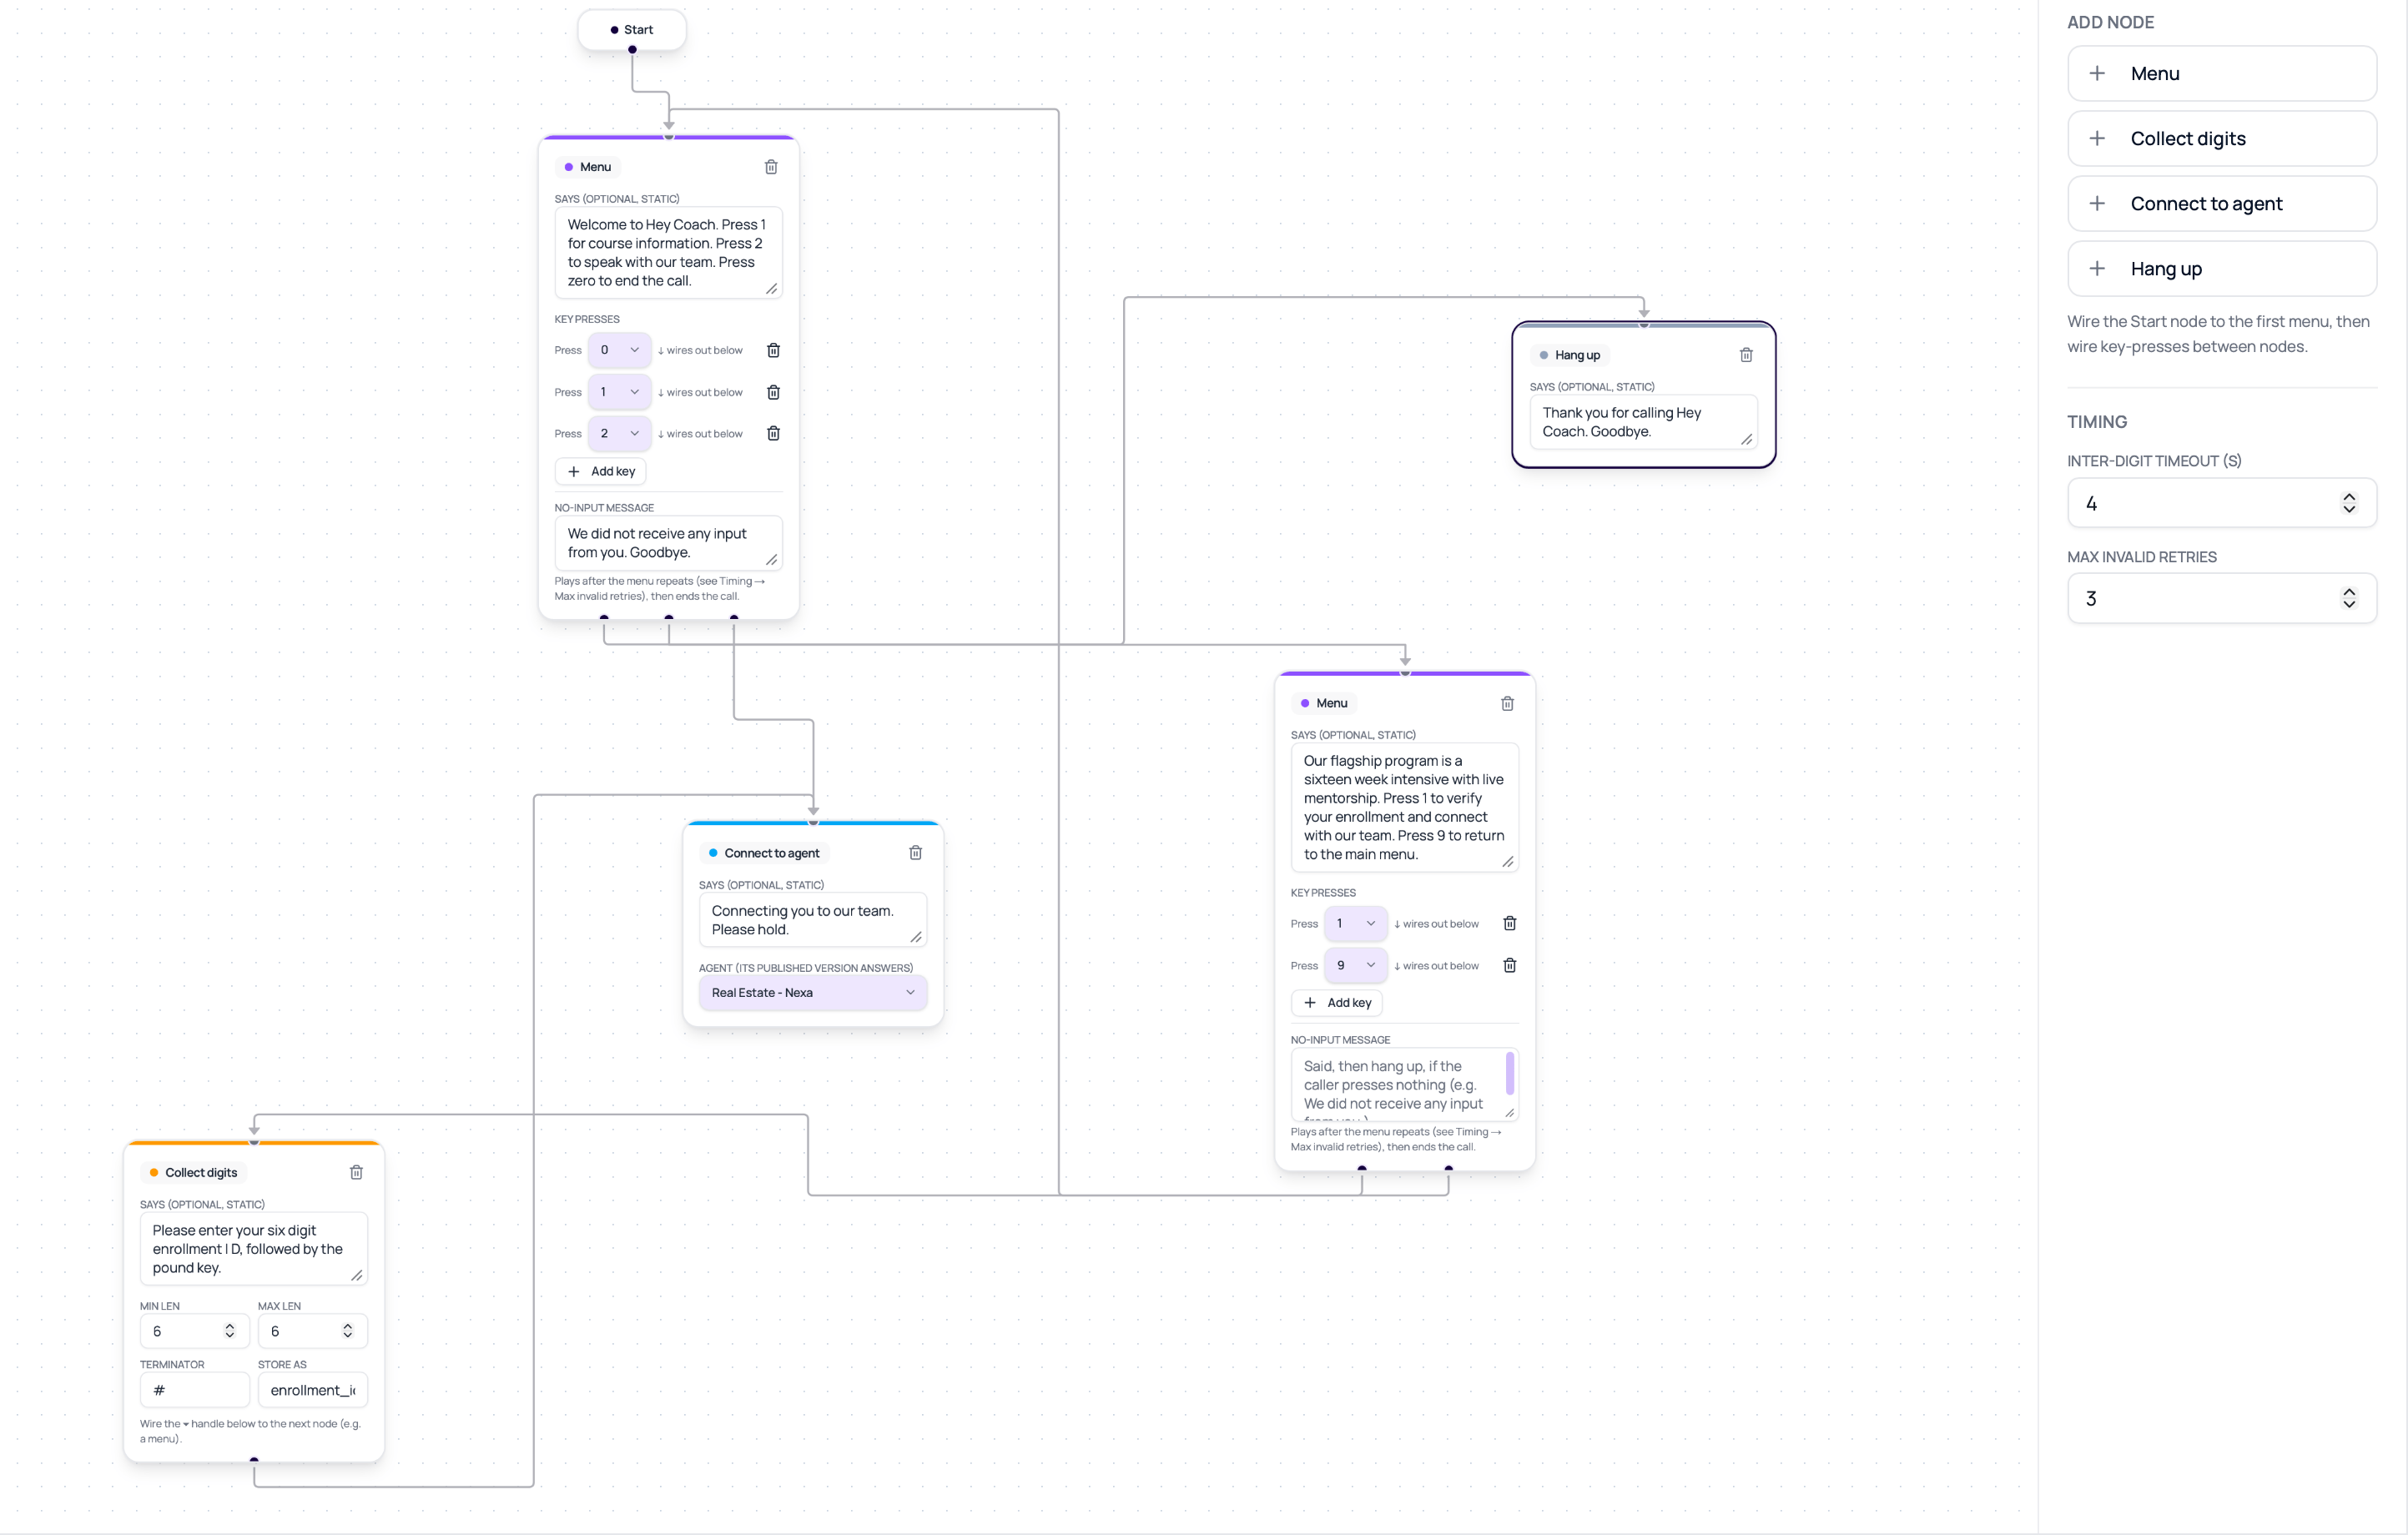
Who Should Use DialNexa IVR Agents
Use an IVR Agent when the first part of a call should be predictable and driven by key presses. Common examples include department routing, language selection, account-number collection, and a menu that hands the caller to a conversational agent. Do not use an IVR Agent when callers need open-ended conversation before routing. IVR Agents do not use an LLM, transcriber, knowledge base, functions, or fallback model while the caller is in the IVR menu.Before You Begin
- Open Agents > Create agent > Manual Build and select Show the IVR agent.
- Publish every non-IVR agent that the menu should connect to.
- Write static menu prompts. IVR prompts cannot contain dynamic variables such as
{{customer_name}}. - Plan a valid path from Start to a Menu node and from each key option to a real node.
- Use a phone call for testing. Web tests are not available for IVR Agents.
IVR Node Types
The Connect To Agent node uses the target agent’s current published configuration loaded for the call. It does not create a second phone leg. The target agent can use its own call-transfer settings after the handoff, but the IVR menu itself does not transfer directly to a human number.
Build An IVR Menu
1
Create the IVR Agent
Open Agents and select Create agent. Select Manual Build, reveal Show the IVR agent, then select IVR Agent. DialNexa creates a blank IVR draft directly because conversational templates do not apply to IVR.
2
Connect Start to the first menu
Open the full-screen IVR editor and connect the Start node to the first Menu node. Start must lead to a valid entry node before publishing.
3
Add keypad routes
Write a static prompt, then map each announced key to a Menu, Collect Digits, Connect To Agent, or Hang Up node. Each branch displays its digit on the connecting line. Compare these labels with the spoken prompt and do not announce a key that has no connected destination.
4
Configure digit collection
Set the minimum and maximum digit count, the variable name used to store the result, and an optional terminator. The default terminator is
#.5
Choose the handoff target
In a Connect To Agent node, select a published non-IVR agent in the same workspace. Set a non-empty fallback for every variable listed for the target. The list comes from its latest published version. This node is terminal for the IVR graph because control moves to the selected agent.
6
Review timing and retry settings
The default inter-digit timeout is 3 seconds, and the default maximum invalid attempts is 3. Tune these values only after testing with real callers.
7
Save and publish
Draft changes save automatically while the editor is open. Use Save or Done before leaving, then publish through the normal agent publish action.
Publish Requirements
Publishing validates the complete graph and renders prompt audio before the version becomes available. Publish fails when any of these conditions apply:- Start does not lead to a valid entry node.
- An edge points to a missing node.
- A menu key has no valid destination.
- A Collect Digits node has invalid length or routing settings.
- A Connect To Agent node points to an unavailable, unpublished, or IVR agent.
- A handoff target requires a variable without a non-empty fallback on its Connect To Agent node.
- Prompt audio cannot be rendered and cached.
- Static prompt text contains a dynamic variable placeholder.
Handoff Variables And Publishing Warnings
Each Connect To Agent node needs fallback values for the variables in its target’s published prompt, welcome message, voicemail message, and default-variable map. A target default can prefill the field, but review it before publishing. Test-call forms and batch recipient mapping also expose target variables. At handoff, values are combined in this order, with later non-empty runtime values winning:- The target agent’s own defaults.
- Fallback values on the IVR node.
- Variables supplied with the live call.
- Values collected from the caller through IVR digit input.
Cached IVR Prompt Recovery
Published IVR prompts have a durable audio backup so a temporary cache expiry does not require you to rebuild the menu. DialNexa attempts to restore missing clips before inbound or outbound menu playback. If required audio cannot be restored, call setup can fail rather than play an incomplete menu. If a published IVR stops playing its prompts, test a fresh call and check its outcome. Contact support with the agent version and call ID if the failure persists.Verify The IVR Agent
Assign the published version to a phone route and place a test call. Test every key, invalid input, no-input behavior, digit terminator, handoff, and hang-up path. After an agent handoff, confirm the target agent uses its current published behavior.IVR Recordings And Transcripts
The IVR menu phase is not recorded or transcribed. A call that stays in the keypad menu can therefore have no recording or transcript. Recording begins when the call hands off to a conversational agent, so evidence covers that conversation. Use the Agent type filter in Call History to review menu-only and handed-off calls. If publishing reports that the prompt-audio cache is unreachable, retry after service recovery. Shortening otherwise valid prompts will not fix a cache outage. Other rendering errors identify the affected prompts; correct the voice or prompt and try again.Billing Behavior
IVR prompt playback and keypad routing do not start the conversational AI stack. The editor shows your plan’s IVR cost per minute + Telephony. Open the pricing tooltip to see the two components. Telephony varies by phone number and can apply throughout the call; a zero IVR rate does not mean the phone call is free.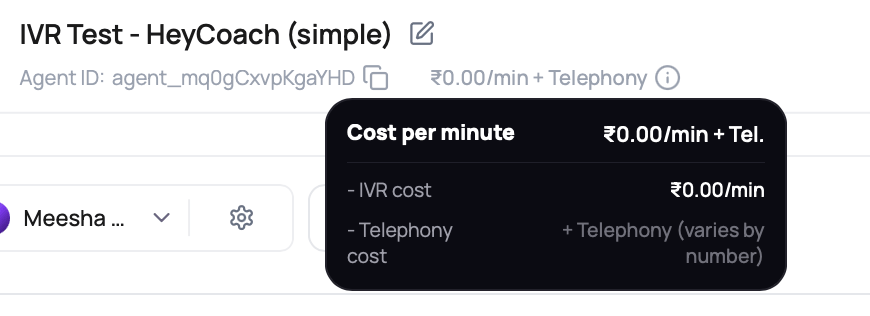
Troubleshooting
The IVR option is missing
The IVR option is missing
Confirm that you opened Manual Build, then select Show the IVR agent. If the card is still missing after a refresh, contact DialNexa support with the workspace ID shown under Workspace Settings > General.
Publish fails on prompt audio
Publish fails on prompt audio
Check every Menu and Hang Up prompt. Remove dynamic variables, confirm the selected voice is available, and publish again.
The caller cannot reach the target agent
The caller cannot reach the target agent
Confirm the Connect To Agent node selects a non-IVR agent in the same workspace and that the target has a published version.
A key press goes nowhere
A key press goes nowhere
Compare the spoken prompt with the configured DTMF edges. Every announced key must connect to an existing node.