

Before You Begin
Use an exported DialNexa agent JSON file from a trusted workspace. Keep the original agent available until the imported configuration has been reviewed and tested.Where to Find the Import Action
On the Agents tab, click the Import Agent button in the top right area of the page (next to Create agent). A file picker opens. Select the JSON file exported from DialNexa. Alternatively, if you are in a folder view, the import button is available at the folder level and will place the imported agent into that folder.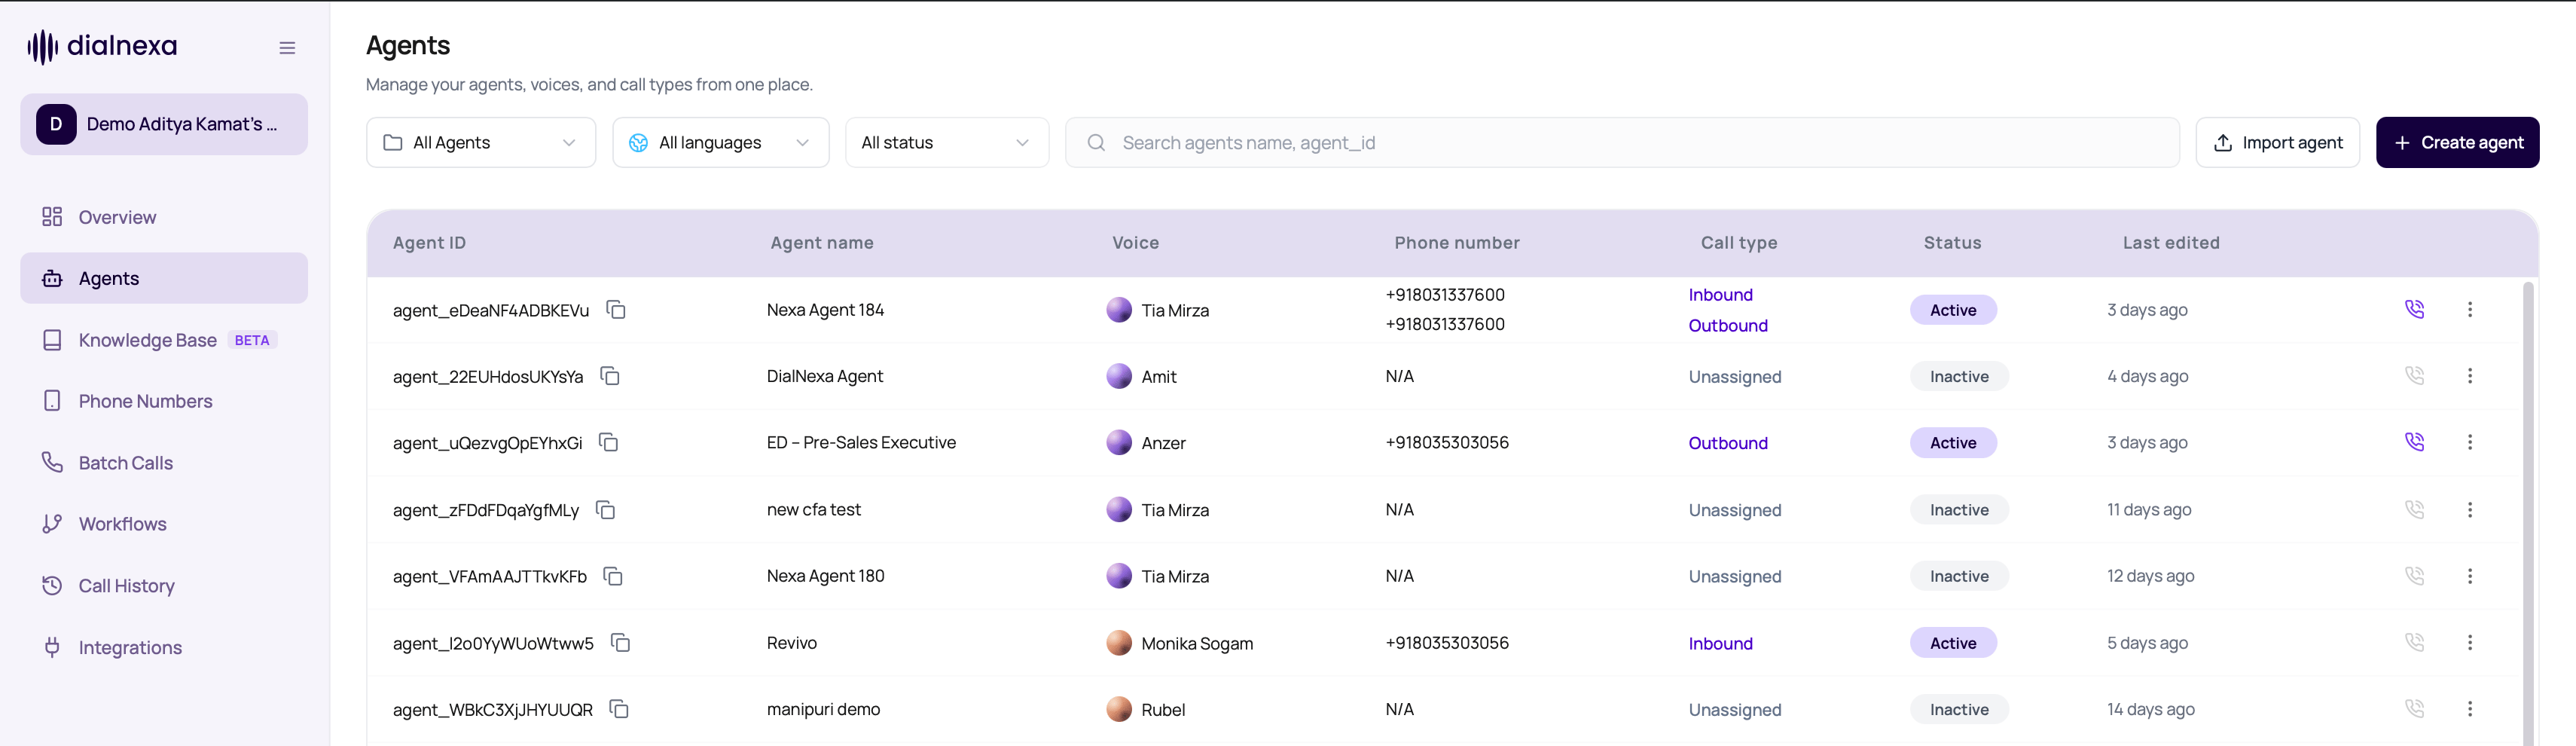
What the JSON Contains
A DialNexa agent export is a JSON object that captures the full configuration of a specific agent version. The structure includes:Import Agents Without Phone Bindings
Exports remove inbound and outbound phone bindings, including nested phone-provider objects. Import also ignores bindings in older JSON files, including legacy telephony-provider IDs. After import, publish the reviewed draft and assign phone numbers explicitly in the destination workspace. IVR exports and imports preserve the menu graph. Review every Connect To Agent target in the destination workspace and set the required fallback variables. Publishing validates the targets and regenerates cached prompt audio.What Does Not Transfer on Import
Some configuration is workspace-specific and cannot be transferred via JSON.How to Import
1
Obtain the export file
In the source workspace, open the agent, click the row action menu or the agent settings menu, and select Export. DialNexa downloads a
.json file to your computer.2
Open the destination workspace
Switch to the workspace where you want to import the agent. If you manage multiple workspaces, use the workspace selector in the top navigation.
3
Click Import Agent
On the Agents tab, click Import Agent. Select the
.json file from your computer.4
Confirm the import
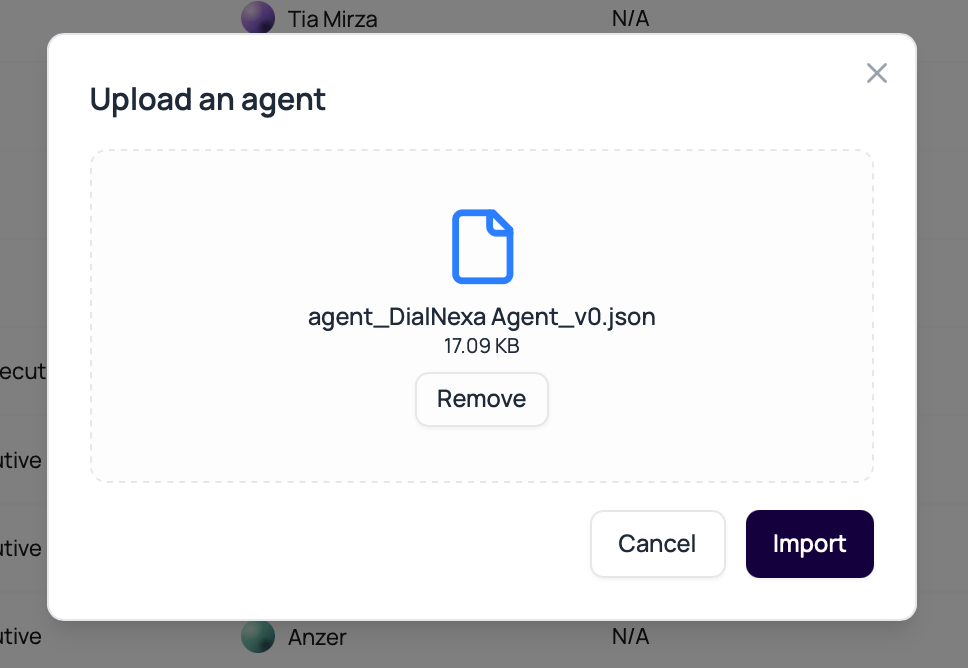
DialNexa validates the file and shows a preview of the agent name and configuration. Click Import to confirm. The button shows an importing state while the draft is being created.
5
Review and adjust the draft
The imported agent opens as a draft. Review the stack settings, prompt, and functions. Update anything that needs to differ in the new workspace (for example, API endpoints that point to a different environment).
6
Publish and assign
When the agent is ready, publish it and assign it to the appropriate phone number, workflow, or batch call in this workspace.
Supported JSON Format
The import endpoint accepts only JSON files exported by DialNexa. Manually authored JSON or files exported from third-party voice AI platforms are not supported. The expected top-level structure is:end_call_on_silence_sec is kept between 15 and 30 seconds, max_call_duration_sec is kept between 60 and 5,400 seconds, and backchannel_frequency is kept between 0 and 1. Function display names, the post-call analysis LLM, and the setting that boosts dynamic variable values are preserved when present. Review any normalized values before publishing the draft.
Common Import Errors
Invalid JSON format
Invalid JSON format
The file could not be parsed. This happens if the file was manually edited and introduced a syntax error. Open the file in a JSON validator and fix the structure before retrying.
Unsupported agent type
Unsupported agent type
The agent type value in the JSON is not recognized. This can occur if the file was exported from a newer version of DialNexa than the destination workspace supports. Contact support if this occurs.
Voice or transcriber not available
Voice or transcriber not available
A voice ID or transcriber referenced in the JSON is not available in the destination workspace’s region or plan. The import succeeds but that specific setting is reset to the workspace default. Review the stack after import.
An imported call setting changed
An imported call setting changed
The export contains a value outside the limits accepted for new agents. DialNexa moves the value to the nearest supported limit so the draft can be created. Review silence detection, maximum call duration, and backchannel frequency before publishing.
Function endpoint is unreachable
Function endpoint is unreachable
Functions are imported as-is but the destination workspace cannot validate endpoints at import time. The function will appear in the agent settings. Test it with a test call after import.
File too large
File too large
Import files have a size limit. If the file exceeds the limit (typically caused by a malformed export), re-export from the source agent and retry.
Verify The Imported Agent
Open the imported draft and review its prompt, provider stack, variables, functions, settings, and missing connections. Publish a test version, run a controlled call, and confirm the result in Call History.Preserve Imported Agent Settings
Importing or duplicating an existing agent preserves its Audio Cache and predictive preprocessing settings, including settings that were disabled on the original. You do not need to enable them just to copy the agent. Changing those restricted settings on an existing agent still follows workspace permissions. For an API import, useimported_from_file: true on Create Agent. Review the saved draft and test it before publishing; import does not restore exported phone bindings.
Verify Copied Speech And Analysis Settings
Import and duplicate flows preserve Noise Suppression Strength, the reminder message text, and the post-call extraction model when present in the source agent. Older values are normalized to current limits: denoising strength stays within levels 0 through 4, and reminder text is limited to 150 characters. Review these settings and the post-call fields before publishing the copy.Related Reading
Types Of Agents
Choose the right agent type before building or importing.
Agent Templates
Start from a pre-built template instead of an export.
Agent Versions and Publishing
Publish the imported draft to make it live.
Agent Folders
Organize imported agents into the right folder.